

前言
近两天公司团建😭没有及时更新!我又来了!
开始web篇了,那必然少不了与前端交互,现在介绍一种 简单直接的与前端交互的方式——Thymeleaf。
Thymeleaf是什么
Thymeleaf 是一款用于渲染 XML/XHTML/HTML5 内容的模板引擎。它可以在不启动web应用的情况下,使用浏览器打开后,也会显示正确的模板页面,下面开始学习。
首先 我们在pom文件中引用thymeleaf的maven,坐标如下:
<dependencies>
    <!--模板引擎-->
    <dependency>
        <groupId>org.springframework.boot</groupId>
        <artifactId>spring-boot-starter-thymeleaf</artifactId>
    </dependency>
    <!--解决html校验报错-->
    <dependency>
        <groupId>net.sourceforge.nekohtml</groupId>
        <artifactId>nekohtml</artifactId>
        <version>1.9.22</version>
    </dependency>
</dependencies>
application配置文件内容如下:
server.port=8085
# 指定模板路径
spring.thymeleaf.prefix=classpath:/templates/
# 后缀
spring.thymeleaf.suffix=.html
# 模板格式
spring.thymeleaf.mode=HTML5
spring.thymeleaf.encoding=UTF-8
spring.thymeleaf.content-type=text/html
spring.thymeleaf.cache=false
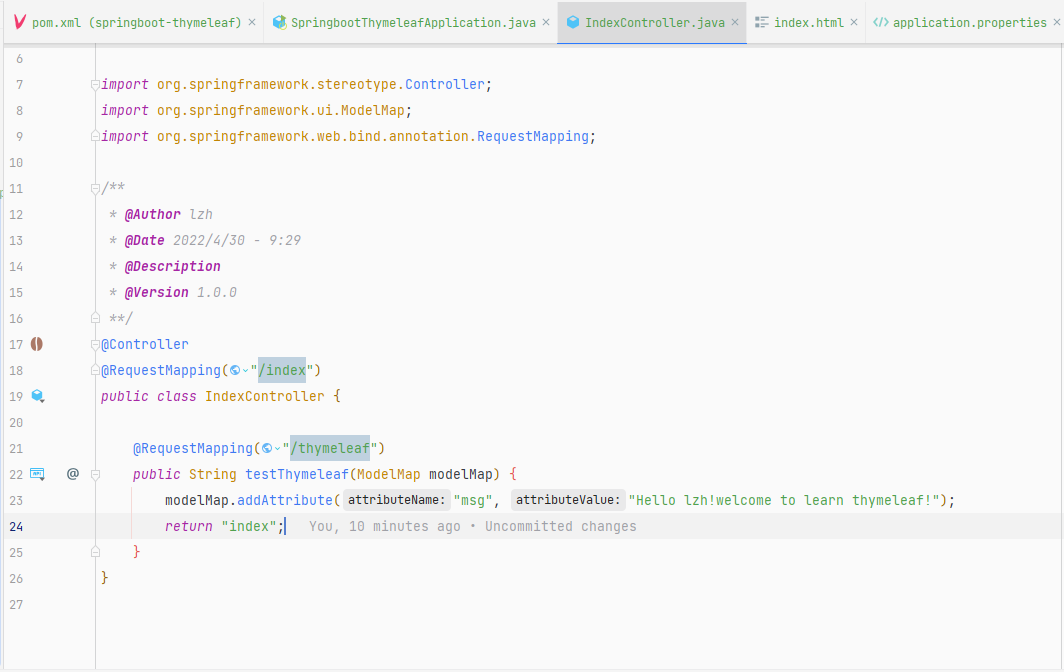
新建controller,内容与之前差不多
然后在resources文件夹下新建templates文件夹,在里面新建一个index.html页面
<!DOCTYPE html>
<html lang="en" xmlns:th="http://www.thymeleaf.org">
<head>
    <meta charset="UTF-8">
    <title>Title</title>
</head>
<body>
<h1 th:text="${msg}"></h1>
</body>
</html>
到此我们准备工作就做完了,让我们启动来看看,启动后浏览器访问
localhost:8085/index/thymeleaf

这正是我们在controller类里面 返回的内容。
这只是模板引擎中最简单的一个使用方法
th:text="${msg}",下面我列举几个常用的标签写法。
在controller里面新建方法,如下:
@RequestMapping("/user")
public String getUser(ModelMap modelMap) {
    User user = new User();
    user.setAge(18);
    user.setBirthday(new Date());
    user.setName("张三");
    user.setPhone("18856781234");
    modelMap.addAttribute("user",user);
    return "user";
}
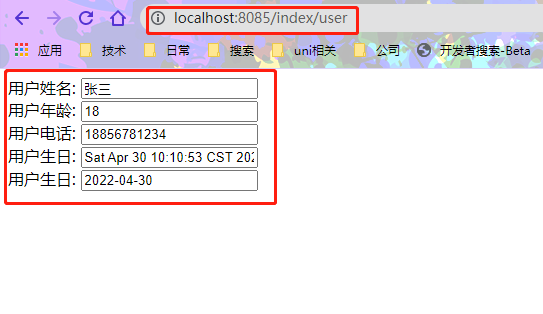
在templates文件夹里面新建user.html页面。
<!DOCTYPE html>
<html lang="en">
<head>
    <meta charset="UTF-8">
    <title>Title</title>
</head>
<body>
<div>
    用户姓名:<label>
    <input th:id="${user.name}" th:name="${user.name}" th:value="${user.name}"/>
</label>
    <br/>
    用户年龄:<label>
    <input th:value="${user.age}"/>
</label>
    <br/>
    用户电话:<label>
    <input th:value="${user.phone}"/>
</label>
    <br/>
    用户生日:<label>
    <input th:value="${user.birthday}"/>
</label>
    <br/>
    用户生日:<label>
    <input th:value="${#dates.format(user.birthday,'yyyy-MM-dd')}"/>
</label><!--时间格式转换-->
    <br/>
</div>
</body>
</html>
启动项目后,我们在浏览器访问:
更多使用方法,可以访问https://www.thymeleaf.org/documentation.htmlthymeleaf官网进行学习
源码地址:点击访问欢迎评论点star
710