

前言😶🌫️
在很多时候 我们在开发项目的时候 基本都会用到文件附件或者照片的上传与下载。有的是上传本地,有的是上传到阿里云或者腾讯云的oss上面,上传方法都大同小异,下面我会介绍本地上传的方法。
本demo前端页面依然用的是thymeleaf,简单快捷,话不多说,直接上代码。
后台🧨
创建项目,在pom文件中添加如下:
<dependencies>
    <!--模板引擎-->
    <dependency>
        <groupId>org.springframework.boot</groupId>
        <artifactId>spring-boot-starter-thymeleaf</artifactId>
    </dependency>
    <!--解决html校验报错-->
    <dependency>
        <groupId>net.sourceforge.nekohtml</groupId>
        <artifactId>nekohtml</artifactId>
        <version>1.9.22</version>
    </dependency>
    <dependency>
        <groupId>commons-io</groupId>
        <artifactId>commons-io</artifactId>
        <version>2.11.0</version>
    </dependency>
</dependencies>
application.properties配置文件中添加模板以及上传配置
server.port=8081
spring.thymeleaf.prefix=classpath:/templates/
spring.thymeleaf.suffix=.html
spring.thymeleaf.mode=HTML5
spring.thymeleaf.encoding=UTF-8
spring.thymeleaf.content-type=text/html
spring.thymeleaf.cache=false
#修改文件上传的大小限制
#设置上传的文件大小
spring.servlet.multipart.max-file-size=100MB
#设置请求携带数据的大小
spring.servlet.multipart.max-request-size=100MB
新建indexController,用于页面跳转
package com.world.lzh.controller;

import org.springframework.stereotype.Controller;
import org.springframework.web.bind.annotation.RequestMapping;

/**
 * @Author lzh
 * @Date 2022/5/6 - 9:04
 * @Description
 * @Version 1.0.0
 **/
@Controller
public class IndexController {

    @RequestMapping("/")
    public String index() {
        return "index";
    }
}
下面就是创建处理文件的controller。
package com.world.lzh.controller;

import org.apache.commons.io.FileUtils;
import org.springframework.web.bind.annotation.RequestMapping;
import org.springframework.web.bind.annotation.RequestParam;
import org.springframework.web.bind.annotation.RestController;
import org.springframework.web.multipart.MultipartFile;

import javax.servlet.http.HttpServletRequest;
import javax.servlet.http.HttpServletResponse;
import java.io.*;
import java.text.SimpleDateFormat;
import java.util.Date;
import java.util.UUID;

/**
 * @Author lzh
 * @Date 2022/5/6 - 9:05
 * @Description
 * @Version 1.0.0
 **/
@RestController
public class FileController {

    public static final String FILE_ROOT_PATH = "D:/fileUpload/";

    @RequestMapping("/upload")
    public String upload(@RequestParam("file") MultipartFile file, HttpServletRequest request) throws Exception {
        //创建一个时间字符串,用于区分文件夹
        String dateStr = new SimpleDateFormat("yyyyMMdd").format(new Date());
        //拼接路径
        String uri = FILE_ROOT_PATH + dateStr + "/";
        //判断文件夹是否存在,如果不存在,就新建
        File dir = new File(uri);
        if (!dir.exists()) {
            dir.mkdirs();
        }
        //获取文件名
        String fileName = file.getOriginalFilename();
        String newFileName = UUID.randomUUID() + fileName.substring(fileName.lastIndexOf("."));
        File f = new File(dir.getPath() + File.separator + newFileName);
        FileUtils.copyInputStreamToFile(file.getInputStream(), f);
        String fileUrl = uri + newFileName;
        return fileUrl;
    }

    @RequestMapping("/download")
    public void download(@RequestParam("text") String text, HttpServletRequest request, HttpServletResponse response) {
        File file = new File(text);
        response.setHeader("content-type", "application/octet-stream");
        response.setContentType("application/octet-stream");
        response.setHeader("Content-Disposition", "attachment;filename=" + file.getName());
        byte[] buff = new byte[1024];
        BufferedInputStream bis = null;
        OutputStream os = null;
        try {
            os = response.getOutputStream();
            bis = new BufferedInputStream(new FileInputStream(file));
            int i = bis.read(buff);
            while (i != -1) {
                os.write(buff, 0, buff.length);
                os.flush();
                i = bis.read(buff);
            }
        } catch (IOException e) {
            e.printStackTrace();
        } finally {
            if (bis != null) {
                try {
                    bis.close();
                } catch (IOException e) {
                    e.printStackTrace();
                }
            }
        }
    }
}
页面🎈
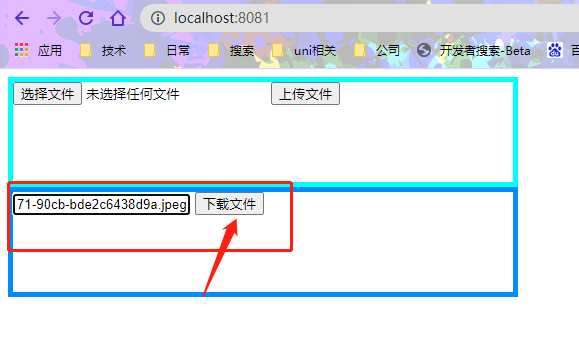
新建index页面,样式我就不管了 丑点就丑点吧,为了区分上传和下载,我分别用两个div分开了。
<!DOCTYPE html>
<html lang="en" xmlns:th="http://www.thymeleaf.org">
<head>
    <meta charset="UTF-8">
    <title>文件上传与下载</title>
</head>
<body>
<div style="border:5px solid aqua;width: 500px;height: 100px">
    <form action="/" th:action="@{/upload}" method="post" enctype="multipart/form-data">
        <input type="file" name="file" id="file"/>
        <input type="submit" value="上传文件">
    </form>
</div>
<div style="border:5px solid #008cff;width: 500px;height: 100px">
    <form action="/" th:action="@{/download}" method="post">
        <input type="text" name="text" id="text" placeholder="输入路径"/>
        <input type="submit" value="下载文件">
    </form>
</div>
</body>
</html>
启动~🦴
启动项目后,使用浏览器访问
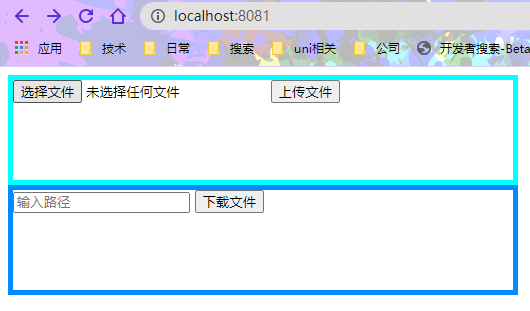
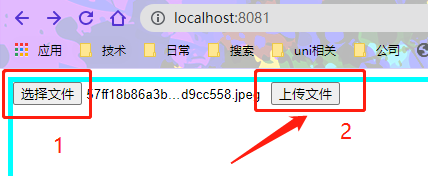
选择一张照片,点击上传文件按钮
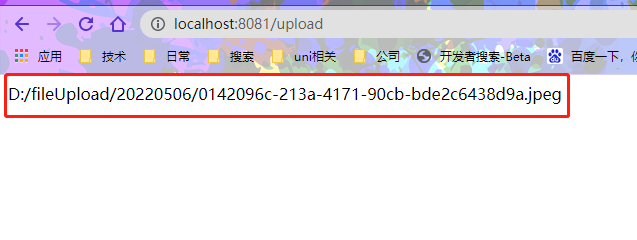
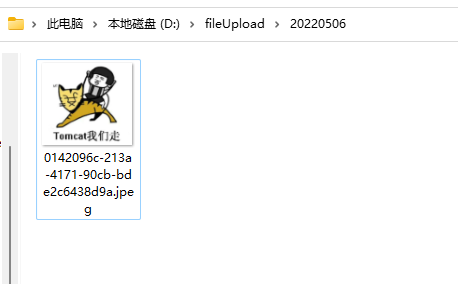
会发现返回了一个路径,我们拿着这个路径去电脑里寻找,可以看到 图片上传成功了!!
我们复制一下那个路径,回到首页,在输入框输入下载链接,点击下载。
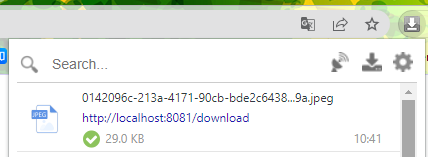
下载成功!

源码地址:点击访问欢迎评论star⭐
163